Why your C-section scar can feel like it’s running the show (and what to do about it)
A C-section scar is small. But it can have a surprisingly big say in how your whole lower belly looks and feels.
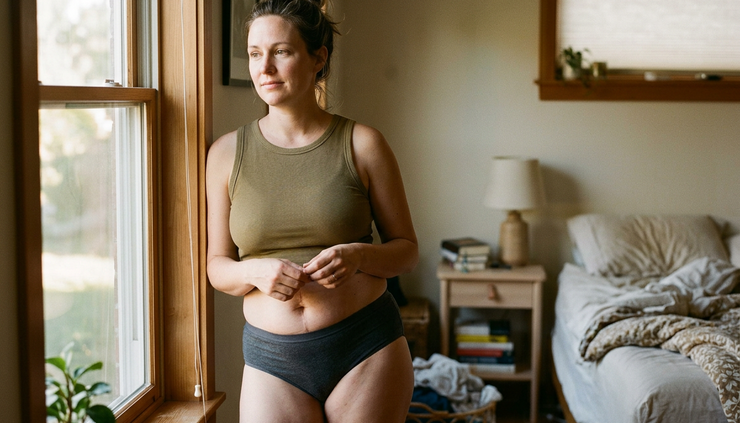
Years after birth, a lot of mums still notice a soft fold, a ledge, or an overhang just above the scar. Sometimes the area feels numb, sometimes it feels tight, like everything underneath is stuck down. And often the shelf is still there even when you’re eating well, moving your body, and looking after your skin.
I’ve had two C-sections myself, and I’ve worked with C-section mums exclusively for the last six years, so I can tell you this: there is no expiry date on working with this area. Whether your baby is 8 months old or 18 years old, gentle scar and core work can still help your tissues move better, ease that pulling feeling, and change how your lower belly looks and feels.
This isn’t about punishment workouts or endless crunches (please don’t). Your body grew and birthed a human. It needs skilled, kind support, not a boot camp.
A quick note before we start: this article is general information only. If your scar is painful, red, hot, weeping or very tender, or you have pelvic pain, or symptoms of a hernia or prolapse, please see a women’s health physiotherapist, your GP, or another healthcare professional first.
1. Check how your scar moves before you try to change it
Before you massage, stretch or strengthen anything, take a minute to get curious. Think of it as finding out what you’re actually working with.
A scar can look neat on the surface and still feel restricted underneath. Scar tissue can attach to the layers around it (skin, fascia, muscle), and when those layers can’t glide over each other, the belly above or below can look pulled, puckered or shelf-like.
That doesn’t mean something is wrong with you. It just means the tissue needs a little help remembering how to move.
How to check
Make sure your scar is fully healed before touching it directly. Then:
Lie on your back with your knees bent.
Place your fingertips on or just above the scar.
Gently move the skin up and down, side to side, in small circles, and diagonally.
Repeat these movements pulling down underneath the scar.
Notice what happens.
Keep the pressure light. You’re not digging for anything, you’re listening.
Look out for areas that feel sticky or stuck, tender, numb, thickened, tight in one direction, or more sensitive than the rest. It’s very common for one side to glide easily while the other says, “not today, thank you”. That’s useful information, not a failure.
The aim isn’t to force movement, it’s to understand where your tissues already glide and where they need more care.
2. Use slow finger circles and glides to help the scar feel safe
Scar massage often gets talked about as if it has to be intense. It really doesn’t. If your nervous system is already guarding the area, pushing in hard can make your body tighten up even more.
Slow and steady works better than anything aggressive. Bodies soften when they feel safe. Think less “kneading bread dough” and more “coaxing a shy cat out from under the sofa”.
A gentle routine (3 to 5 minutes, a few times a week)
Start around the scar, not on it. Place two or three fingertips above it and make slow circles over the skin.
Move along the length of the scar, pausing wherever it feels tight.
Glide the skin gently up, down and side to side.
If that feels comfortable, repeat directly over the scar.
Mild tenderness can be normal. Sharp pain, burning or a strong flinch is your cue to back off.
What you might notice
Warmth, a slight softening, better skin movement, less tugging when you stand tall, and more awareness of your lower belly.
You might also feel emotional, and that’s more common than people expect. Birth, surgery, recovery, broken sleep, feeding, toddlers, the school run (it all lives somewhere in the body). If touching your scar brings up feelings, go gently. There’s no prize for rushing.
3. Breathe into your back to stop pushing pressure into the lower belly
So many of us were told to “pull your tummy in” after birth. The intention is usually kind, but constant gripping can create more pressure in the very place you want less of it.
If every breath travels forward into the lower belly, the area around your scar gets pushed from the inside again and again. Over time, that can add to the feeling of heaviness, doming or overhang.
A better starting point is 360-degree breathing, where your ribs, sides, back and belly all share the breath, so no single area has to do the whole job.
Supported child’s pose
Kneel on the floor or bed.
Place a cushion or folded pillow between your thighs and belly.
Sit your hips back towards your heels and rest your chest and belly onto the cushion.
Rest your forehead on your hands, another cushion, or the floor.
Breathe slowly into your back ribs.
Imagine your back widening like an umbrella opening as you breathe in. As you breathe out, your ribs soften and your lower belly gently recoils. Don’t suck in and don’t brace.
Stay for 5 to 8 breaths.
Why this helps
Your diaphragm, pelvic floor, deep abdominals and back muscles all coordinate with your breath. When that system gets stuck, the lower belly ends up taking more pressure than it should.
This is why reducing a C-section shelf isn’t always about doing more ab exercises. Often the first win is simply learning to stop pushing pressure into the area all day long.

4. Release the obliques with a gentle side bend
This one is a big deal for C-section mums, and here’s why.
After surgery, your lower abdominals tend to switch off. They’ve been cut through and they’ve been through a lot, so the connection between your brain and those muscles often goes quiet. But your body still needs your trunk to be stable, so something has to pick up the slack.
That something is usually your obliques, the muscles along the sides of your waist. They tighten and overwork to do a job that isn’t really theirs, and over time that constant gripping can pull on the abdominal wall and create that “breadloaf” effect, with the overhang sitting above the scar.
So the aim here isn’t stretching for the sake of it. When we release the obliques, we give your lower abs a chance to actually do their job, which is exactly what we’re building towards with the “s” breath in step 5.
A simple release
You can do this seated on a chair, kneeling on the floor, or standing.
Sit, kneel or stand tall.
Place one hand on your lower ribs and reach the other arm overhead.
Gently lean to the side and breathe into the open side of your ribs.
Stay for 3 to 5 slow breaths, then repeat on the other side.
You should feel a stretch along the side of your waist, not a pinch in your lower back. If it’s too strong, make the movement smaller.
Optional: add a tiny rotation.
While leaning, turn your chest slightly towards the floor, then slightly towards the ceiling, moving slowly. This helps different fibres of the obliques and ribs let go.
No heroics needed here. Your side body just needs a polite invitation to let go.
5. Use an “s” breath to wake up the lower abs
Once the scar area is moving better, your breath is spreading more evenly and your side body has softened, you can ask your lower abdominals to join in.
The “s” breath is a simple way to feel your deep lower tummy muscles switch on, without crunches or planks before your body is ready. It’s especially helpful if your lower belly tends to bulge out when you breathe out, lift, cough or get up from the sofa.
How to do it
Lie on your back with your knees bent (or sit upright if that’s more comfortable).
Place your hands on your lower belly, just inside your hip bones.
Take a gentle breath in, into your ribs and back.
Breathe out with a long, steady “ssssss” sound.
Feel your lower belly draw away from your hands.
Keep going to the end of the exhale, then relax and breathe in again.
Try 5 to 8 rounds. The sound matters, because a soft sigh doesn’t give your deep core enough feedback, whereas the “ssss” creates resistance and helps it switch on.
What to look for
Your lower belly draws away from your hands
Your ribs soften down
Your bum stays relaxed
Your jaw and shoulders stay easy
If your tummy pushes into your hands, ease off the effort and slow the exhale down. You can also go back to the supported child’s pose breathing for a few days and try again.
This is about coordination, not effort. A good deep core contraction often feels subtle. If you’re shaking and clenching, it’s too much.
How often should you do this work?
You don’t need a long routine. Shorter sessions are easier to stick with, especially when family life already keeps you busy enough.
A gentle weekly rhythm could look like this:
Practice | Time | Frequency |
Scar movement check | 1 to 2 minutes | Once a week |
Scar circles and glides | 3 to 5 minutes | 3 to 5 times a week |
Supported back breathing | 2 to 4 minutes | Daily if possible |
Side-bending release | 2 minutes | Most days |
“S” breath | 2 to 3 minutes | 3 to 5 times a week |
And you can slot it into real life:
Scar massage after a shower
Back breathing before bed
Side bends while the kettle boils
“S” breaths before a walk.
Small, repeated signals matter. Your tissues respond to consistency far more than to one big Sunday night effort that never happens again.
What results can you expect?
I’ll be honest with you, because I think you deserve that.
These five steps are a brilliant place to start, and many women notice real changes from them: less pulling around the scar, a softer, less stuck feeling, less pressure pushing forward, better posture and a lower belly that feels more supported. The comfort change often comes first, and the visual change can be subtle at the start. Both count.
But changing an overhang takes more than five exercises repeated on a loop.
Skin laxity, body composition, genetics, posture, hormones and the way your scar healed all play a part, and every one of those is individual to you. On top of that, the tissues need to be guided through the right steps in the right order. Release what’s tight, reconnect with the muscles that switched off, build strength back gradually, and only then load it. Skip a step, or do them in the wrong order, and you can end up working hard without much to show for it.
That’s why I created Reclaim & Rise. It’s a progressive plan that takes you through four phases (Release, Reconnect, Rebuild and Rise), so each stage builds on the last and you always know what to do next, rather than piecing it together from random exercises online.
Think of this article as the first step on the path, and a very good one. If you’d like to see where the path leads, you can find out more about Reclaim & Rise here
And if you have significant heaviness, doming, pain, or a bulge that gets worse with effort, or you suspect diastasis recti or a hernia, please get assessed first. You deserve proper support, not guesswork from the internet.
Your body is still allowed to change
There isn’t a short window after birth where healing is possible and then the door closes. Bodies adapt for life. Scar tissue can become more mobile, breathing patterns can change, and muscles can relearn their job.
So start gently. Check how the scar moves. Use slow circles and glides. Breathe into your back. Give your obliques some room. Then use the “s” breath to reconnect with your lower abs.
No panic, no punishment, and no pretending your body hasn’t been through something huge.
Just small, kind work that tells your belly, “you’re safe now, we can soften”.
Not sure where to start? Let’s talk.
Every body heals differently, and every C-section story is different too. If you’ve read this and thought, “I’d love someone to look at my situation and tell me what I actually need,” that’s exactly what a free discovery call is for.
We’ll talk through where you are now, what you’ve noticed in your scar and lower belly, and what the best next step might be for you. No pressure, no hard sell, and no judgement about how long it’s been.
Whether your baby is 8 months or 18 years old, you’re not too late.
Comments